Tom on Automatic Differentiation
Tom Stuart posted up an excellent article on Automatic Differentiation in Ruby with links to his talk slides and video.
Jim Weirich -- Farewell, Friend.
It’s been an odd day. The sort of day where you really don’t know what to say. The only thing you can manage to get out is, “Sigh. I’m going to miss him.”
Jim Weirich was building interesting stuff with Ruby several years before I was introduced to it. Tools that most of us have taken for granted. Tools that were just there.
Before Jim came along… they didn’t exist.
Back in the early Ruby on Rails explosion era (circa 2004-2006), it was much easier to get to know the great Rubyists. I remember finally getting a chance to meet Jim (and _why) at FOSCON here in Portland, which still goes down as one of the best “conferences” I have ever attended.
(I think we all knew something special was happening.)
Jim spoke at a ton of conferences. At any conference that I seemed to get invited to speak at… Jim seemed to always be on the speaker list too. We’d end up meeting up on the conference circuit a several times over the coming years. It was always a delight to catchup.
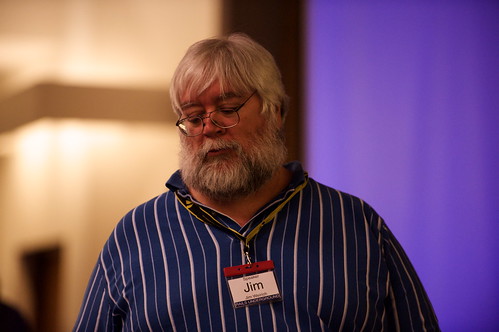 Photo by Obie from Rails Underground 2009
I believe the last one was in 2009 at Rails Underground in London. I remember walking in one of the rooms and spotting Jim. There he was… waiting patiently for his time slot… sitting by the wall in another horribly uncomfortable conference chair… hacking away on his laptop as if he was on a mission to save the human race. In reality, he was probably toying around with some new idea.
As I walked towards him… my red hair must have caught the corner of his eyes… because he looked up and with the warmest of smiles and kindest of voices said, “Robby!”
It’s people like Jim that helped me feel like I had something valuable to contribute to the community. The mere fact that he knew who I was, that he commented on my silly blog posts, referred potential customers to me, showed up for and complimented me on my talks, asked ME for advice on IRC, wished me a happy birthday on Facebook, responded to my lazy tweets… made me feel like I was welcome to (and part of) the party.
A party that started a number of years before I showed up.
Let us raise our glasses high and thank our host for the pleasure of being amidst his most generous company.
Thank you, Jim, for helping me learn more about myself. I only wish I had gotten to know you more.
Ruby on Rails developers in New York
We’ve had a number of clients in New York over the years. After a recent trip this last fall to visit clients and attend Cultivate we decided that we should spend more of our time in the city.
In 2014, we’re looking to expand our client base there. If you’re in the NYC area and are looking for an agency that has great Ruby on Rails developers… get in touch.
Setting Akamai Edge-Control headers with Ruby on Rails
Just a short and sweet little tip.
Several months ago we moved one of our clients over to Akamai’s Content Delivery Network (CDN). Ww were previously using a combination of Amazon S3 and CloudFront with some benefits, but we were finding several key areas of the world were not s covered by Amazon (yet) for asset delivery. Along with that, we really wanted to take advantage of the CDN for more of our HTML content with a lot of complex rules that related to geo-targeting and regionalization of content.
I’ll try to cover those topics in another post, but wanted to share a few tidbits of code that we are using to manage Akamai’s Edge-control caches from within our Rails application.
With Akamai, we’re able to tell their Edge servers whether it should hold on to the response so it can try to avoid an extra request to the origin (aka our Rails application). From Rails, we just added a few helper methods to our controllers so that we can litter our application with various expiration times.
  # Sets the headers for Akamai
  # acceptable formats include:
  #   1m, 10m, 90m, 2h, 5d
  def set_cache_control_for(maxage="20m")
    headers['Edge-control'] = "!no-store, max-age=#{maxage}"
  end
This allows us to do things like:
  class ProductsController < ApplicationController
    def show
      set_cache_control_for('4h')
      @product = Product.find(params[:id])
    end
  end
Then when Akamai gets a request for http://domain.com/products/20-foo-bar, it’ll try to keep a cached copy around for four hours before it hits our server again.
Installing Ruby on Rails, Passenger, PostgreSQL, MySQL, Oh My Zsh on Snow Leopard, Fourth Edition
Welcome to what seems like my tenth installment (actually, it’s the fourth) of showing you how I setup my development environment on a fresh OSX install. In this case, I’m actually getting a MacBook setup for a new employee with Snow Leopard.
Over the years, I’ve evolved these following steps and they’ve helped our team maintain a consistent and stable envirnment for Ruby on Rails development. I know that there are a few other ways to approaching this and I’m sure you’ll get similar results, but this approach has allowed me to maintain a hassle-free setup for the last five years.
As with all things… your milage may vary.
Phase One
During this initial phase, we’re going to install the primary dependencies and setup our environment.
XCode
The first thing that you’ll need to do is install XCode, which almost everything depends upon as this will install developer-friendly tools for you. Apple has been kind enough to ship this on your Snow Leopard DVD.

Go ahead and install XCode from the Optional Installs folder.

(might require a reboot)
You can also download it online.
MacPorts
Now we’ll install MacPorts, which the web site describes itself as, “an open-source community initiative to design an easy-to-use system for compiling, installing, and upgrading either command-line, X11 or Aqua based open-source software on the Mac OS X operating system.”
As I’ve said in past versions of this guide, this tool is about to become one of the most important tools on your operating system. It’ll be used time and time again to maintain your libraries and many of the Unix tools that you’ll be using. If you’re from the Linux or BSD world, you are likely familiar with similar tools… such as: apt-get, port, and yum.
You’ll want to download the latest stable version from http://www.macports.org/. Once downloaded, you can install it.

Once this is installed, you’ll be able to use the port command from your console.
Wget
Let’s test out your MacPorts install by installing a useful tool called wget, which we’ll use to install oh-my-zsh.
sudo port install wget
Git and Subversion
Every development environment should have some source code management tools available. We’ll install both of these with one command.
sudo port install git-core +svn
This will install git and subversion.
oh-my-zsh
Oh My Zsh is the most amazing thing to happen to shells since… well since I said so. It’s one of my open source projects that I encourage you to give a whirl.
wget http://github.com/robbyrussell/oh-my-zsh/raw/master/tools/install.sh -O - | sh
That’s it. The next time you open up your terminal, you’ll be running zsh with a bunch of stuff available. For more information, visit http://github.com/robbyrussell/oh-my-zsh.
Terminal theme (optional)
I never understood why the icon for Terminal has a black background but when you start it up the default theme is black on white.

versus

Anyhow, I’m a fan of the the dark background. To change this, open up preferences in Terminal. Select Pro, then click on the Default window so that this sticks around.

Let’s now open up a new Terminal window..
You should be looking at something like this:

Much better… let’s continue.
Phase Two
We’re now going to start installing everything we need to get this running.
Ruby 1.8.7.x
First up, Ruby.
Snow Leopard includes Ruby and Rails already installed, but we’re going to back these up for a rainy day. Just issue these commands:
$ sudo su -
Password:
:~ root# mv /usr/bin/ruby /usr/bin/ruby.orig
:~ root# mv /usr/bin/gem /usr/bin/gem.orig
:~ root# mv /usr/bin/rails /usr/bin/rails.orig
:~ root# logout

Now we’ll go ahead and install a fresh copy of Ruby and RubyGems via MacPorts.
sudo port install ruby rb-rubygems
You should now see something like this for a bit…

Let’s watch a video about bumble bees.
When it finishes installing, you should check that Ruby is available to you and installed in /opt/local/bin.

We’ll also take a second to create a symlink for this as some tools seem to rely on /usr/bin/ruby being there.
sudo ln -s /opt/local/bin/ruby /usr/bin/ruby
Great, let’s move on.
Passenger (mod_rails)
Now that we have Ruby installed, we’re going to take a quick detour to setup Passenger with the Apache server already available on your machine. I’ve been a big fan of using Passenger for your development for over a year now.
sudo gem install passenger
Once the gem is finished installing, you’ll need to install the apache2 module with the following command:
It’ll ask you to continue by pressing Enter. At this point, it’ll check that you have all the necessary dependencies and then compile everything needed for Apache2.

Now I’ll force you to watch a highlights reel of Fernando Torres… the best striker in the world!
The passenger install will then show you this output, which you’ll want to stop and read for a moment and highlight the following:

Then using vi or emacs, you’ll want to create a new file with the following content:
vi /etc/apache2/other/passenger.conf
Then paste in the following (what you highlighted and copied above.)
LoadModule passenger_module /opt/local/lib/ruby/gems/1.8/gems/passenger-2.2.9/ext/apache2/mod_passenger.so
PassengerRoot /opt/local/lib/ruby/gems/1.8/gems/passenger-2.2.9
PassengerRuby /opt/local/bin/ruby
You’ll also want to include the following below what you just pasted.
  # Set the default environment to development
  RailsEnv development

  # Which directory do you want Apache to be able to look into for projects?
  <Directory "/Users/ryangensel/development">
      Order allow,deny
      Allow from all
  </Directory>
You’ll want to quickly start up your web sharing, which will start Apache2 up via your System Preferences.


Simple enough… moving forward.
Passenger Pref Pane
To make things as simple as possible, I’d encourage you to install the Passenger Preference Pane (view this post for a download).

Development directory
I have a directory named development/ in my home directory, which is where I end up storing all of my projects. This should match whatever you put above in the apache configuration (<Directory "/Users/ryangensel/development">).
mkdir development; cd development;
Installing Ruby on Rails via RubyGems
Now we’ll use RubyGems to install the latest version of Ruby on Rails (and all of it’s dependencies).
sudo gem install rails

While this is installing, you can watch a video from my old band that ended around the time that business started picking up for Planet Argon.
Great, let’s test out the install of Rails…
Test Rails and Passenger
In your development directory, let’s quickly a new Rails app…
rails testapp
This will generate a new Rails application in a testapp/ directory.
Now open up the Passenger Preferences Pane and add this directory as a new application.


Press Apply…
You should now fire up your browser of choice and head to http://testapp.local. If all has worked, you’ll see a, “Welcome aboard” screen from the Ruby on Rails application.

Assuming that this worked for you, let’s take a quick break to make some tea…
Phase Three
In this last phase, we’re going to install a few database servers and corresponding rubygems so that you can get to work.
PostgreSQL
At Planet Argon, we build our web applications on top of PostgreSQL. I’ve been a long-time advocate of it and hope you consider using it yourself.
At this point in time, the current stable version of PostgreSQL via MacPorts is 8.4.x. Let’s install that now…
sudo port install postgresql84 postgresql84-server
Once this finishes compiling, you’ll need to run the following commands to setup a new PostgreSQL database.
sudo mkdir -p /opt/local/var/db/postgresql84/defaultdb
sudo chown postgres:postgres /opt/local/var/db/postgresql84/defaultdb
sudo su postgres -c '/opt/local/lib/postgresql84/bin/initdb -D /opt/local/var/db/postgresql84/defaultdb'
Assuming that you want PostgreSQL to always be running, you can run:
sudo launchctl load -w /Library/LaunchDaemons/org.macports.postgresql84-server.plist
...and to start it right now, run:
sudo launchctl start org.macports.postgresql84-server
Before you can start using it, we’ll need to make sure that the PostgreSQL executables are available in your shell path. Since you’re now using oh-my-zsh, you’ll want to edit ~/.zshrc with your favorite editor.
vi ~/.zshrc
Just append this to export PATH= line in the file.
:/opt/local/lib/postgresql84/bin
Your PATH might look something like the following now:
@# Customize to your needs… export PATH=/opt/local/bin:/opt/local/sbin:/usr/bin:/bin:/usr/sbin:/sbin:/usr/local/bin:/usr/X11/bin:/opt/local/lib/postgresql84/bin@
Setup database user
To setup a new database (with superuser credentials), just run:
createuser --superuser ryangensel -U postgres
We’ll now test creating a database:
createdb test_db
Let’s test that we can access it…
➜  ~  psql test_db
psql (8.4.2)
Type "help" for help.

test_db=# \q
Great, let’s drop it now.
➜  ~  dropdb test_db
➜  ~  psql test_db
psql: FATAL:  database "test_db" does not exist
➜  ~
Okay, we’ll now install the library that will allow Ruby to talk to PostgreSQL.
Just run: sudo gem install pg

Voila… let’s move on to the inferior database…
MySQL
We’re going to run through the installation of MySQL really quickly because you might need it.
sudo port install mysql5 mysql5-server
This took ages on my machine… so let’s watch a video.
We’ll now setup the database and make sure it starts on system boot.
 sudo -u _mysql mysql_install_db5
 sudo launchctl load -w /Library/LaunchDaemons/org.macports.mysql5.plist
 sudo launchctl start org.macports.mysql5
Let’s test that we can create a database now (and that it’s running.)
 ➜  ~  mysql5 -u root
 Welcome to the MySQL monitor.  Commands end with ; or \g.
 Your MySQL connection id is 3
 Server version: 5.1.43 Source distribution

 Type 'help;' or '\h' for help. Type '\c' to clear the current input statement.

 mysql> create database test1;
 Query OK, 1 row affected (0.00 sec)

 mysql> \q
Great, we’ll now install the library that will allow Ruby to talk to MySQL.
sudo gem install mysql -- --with-mysql-config=/opt/local/lib/mysql5/bin/mysql_config
That should be it!
Phase Four, next steps
Okay… so we’ve installed XCode, MacPorts, Ruby, Rails, PostgreSQL, MySQL… and I’ve also got you to switch your default terminal shell from bash to zsh. You might take a look over the available themes for Oh My Zsh so that you can personalize your terminal experience even further.
You also now have a handful of gems installed as you can see with gem list.

Closing thoughts…
This is the fourth version of this guide and I’ve appreciated the hundreds of comments, questions, and emails that I have received… let’s not forget all those beers that people buy me when I’m at conferences. :-)
I hope you have found some of this useful. If you have any problems and/or questions, don’t hesitate to post them in the comments section below.
Using model constants for project sanity
On one of our larger client projects (approx. 160 models and growing…) we have a specific model that we refer to quite a bit throughout our code. This model contains less than 10 records, but each of them sits on top of an insanely large and complex set of data. Each record refers to a each of their regions that our client does business in.
For example… we have, Australia, United Kingdom, Canada, United States, and so forth. Each of these regional divisions has their own company code, which are barely distinguishable from the next. They make sense to our client, but when we’re not interacting with those codes on a regular basis, we have to look constantly look them up again to make sure we’re dealing with the right record.
I wanted to share something that we did to make this easier for our team to work around these codes, which we should have thought of long ago.
Let’s take the following mode, Division. We only have about 10 records in our database, but have conditional code throughout the site that are dependent upon which divisions specific actions are being triggered within. Each division has various business logic that we have to maintain.
Prior to our change, we’d come across a lot of code like:
# For all divisions except Canada, invoices are sent via email
# In Canada, invoices are sent via XML to a 3rd-party service
def process_invoices_for(division)
  if division.code == 'XIUHR12'
    # trigger method to send invoices to 3rd party service
    # ...
  else
    # batch up invoices and send via email
    # ...
  end
end
An alternative that we’d also find ourselves using was.
if division.name == 'Canada'Hell, I think I’ve even seen if division.id == 2 somewhere in the code before. To be fair to ourselves, we did inherit this project a few years ago. ;-)
Throughout the code base, you’ll find business rules like this. Our developers all agreed that this was far from friendly and/or efficient and worst of all, it was extremely error-prone. There have been a few incidents where we read the code wrong and/or got them confused with one another. We were lacking a convention that we could all begin to rely on and use.
So, we decided to implement the following change.
Model Constants
You might already use constants in your Ruby on Rails application. It’s not uncommon to add a few into config/environment.rb and call it a day, but you might also consider scoping them within your models. (makes it much easier for you to maintain them as well)
In our scenario, we decided to add the following constants to our division model.
class Division < ActiveRecord::Base
  AFRICA      = self.find_by_code('XYU238')
  ASIA        = self.find_by_code('XIUHR73')
  AUSTRALIA   = self.find_by_code('XIUHR152')
  CANADA      = self.find_by_code('XIUHR12')
  USA         = self.find_by_code('XIUHR389')
  # etc..
end
What this will do is load up ech of these constants with the corresponding object. It’s basically the equivallent of us doing:
if division == Division.find_by_code('XIUHR389')But, with this approach, we can stop worrying about their codes and use the division names that we’re talking about with our clients. Our client usually approaches us with, “In Australia, we need to do X,Y,Z differently than we do in the other divisions due to new government regulations.”
if division == Division::CANADA
  # ...
end

case division
  when Division::AFRICA
    #
  when Division::AUSTRALIA
    # ...
end
We are finding this to be much easier to read and maintain. When we’re dealing with a lot of complex business logic in the application, little changes like this can make a big difference.
If you have any alternative solutions, we’d love to hear them. Until then, we’ve been quite pleased with this approach. Perhaps you’ll find some value in it as well.